
We have almost made it through the dark and dreary winter up here in the northeast and I can see the light at the end of the tunnel! Spring is just around the corner which means it’s maple syrup season!
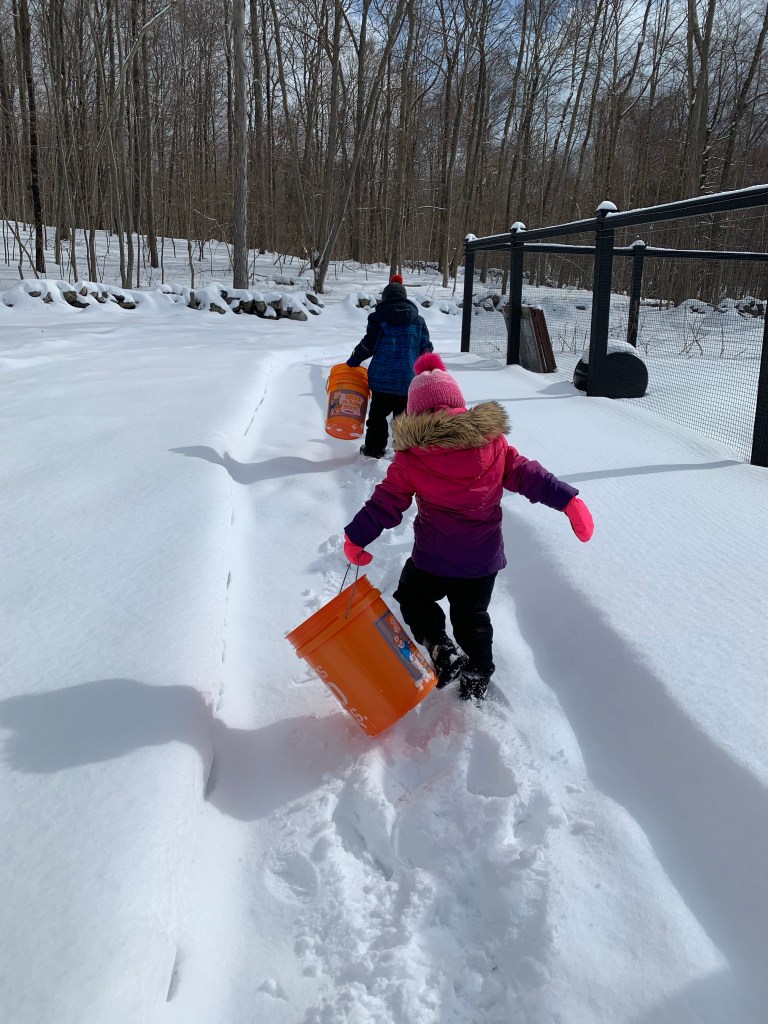
This will be our fourth year tapping trees and it has become a family tradition to tap the first trees together. When the weather looks to be just about right, we grab our children, our tools and our buckets and make the hike back to our maple grove out in the back woods.
Tapping season typically begins when the temperature is above freezing during the day and drops below freezing at night. Depending on where you live, the time of year can vary. Here in NY, we aim for daytime temps in the 40’s and below freezing at night. It is that freeze thaw cycle that causes the sap to flow.
Our operation is pretty small. We usually only have about 7-8 taps. In any given season, that yields us approximately 1/2-1 gallon of syrup. We have plans on expanding our production, but that will come in time. Right now we produce enough syrup to feed our family of 4 and if we have a good season, some extra which we use as gifts.
I know a gallon of syrup doesn’t sound like a lot, which is why pure organic maple syrup (not the cheap stuff from the grocery store) is so crazy expensive. It takes approximately 40 gallons of sap to get 1 gallon of syrup, give or take. The amount of syrup you get also varies with the season.
So, what exactly do you need for maple tapping? Well for starters, maple trees 🙂 If you’re not sure how to identify maple trees, I will be doing a follow up post explaining the identification process. If you have already identified the maple trees that you want to tap, below is a list of equipment you need for tapping / syrup making:
Materials List
- Power drill
- 7/16 inch drill bit
- Taps (we bought ours on Amazon)
- Hammer
- Several 5 gallon buckets with lids (we bought ours at Home Depot)
- 30 gallon garbage can with lid (brand new)
- Stainless steel buffet pans
- Reusable / washable maple syrup filters (we bought ours on Amazon)
- Kitchen funnel
- 8oz glass canning jars and lids
- Candy making thermometer (we bought ours at Michael’s craft store)
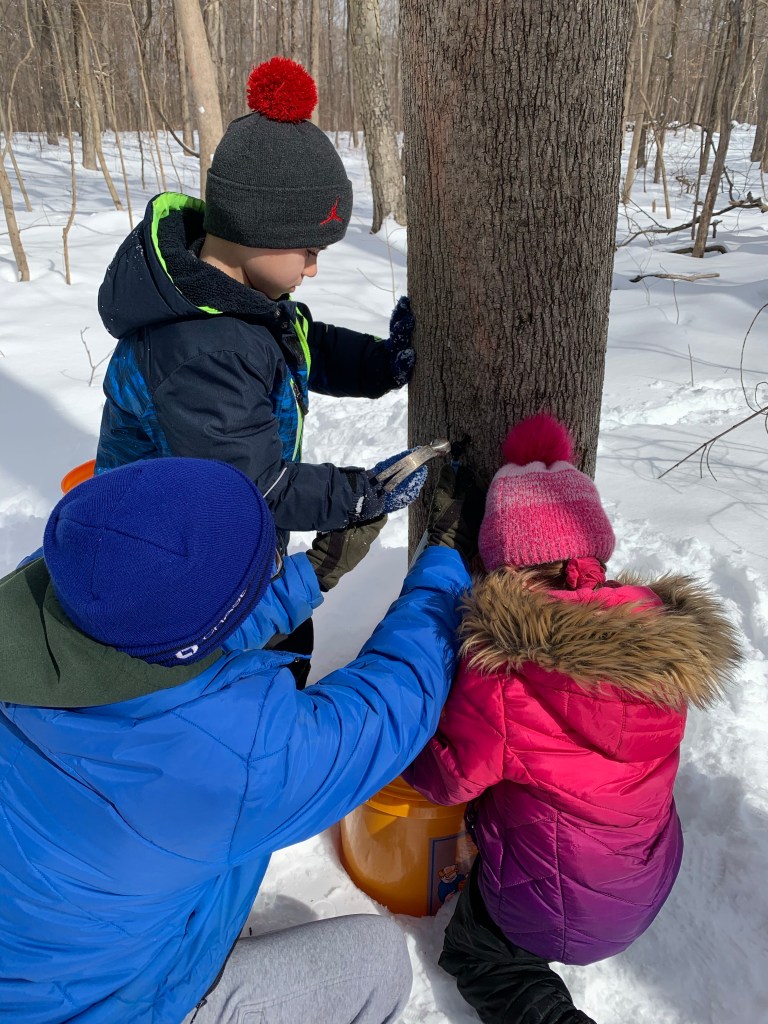
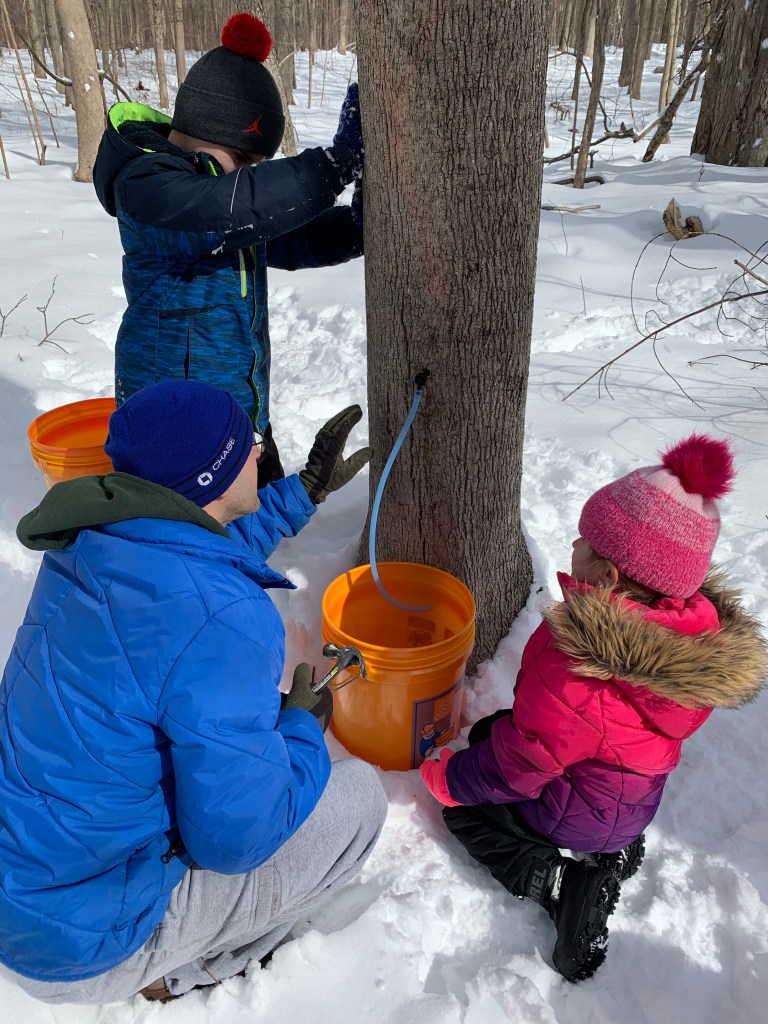
Once you have identified your maples, gathered all of the equipment and the temperature is just right, it’s time to tap!

It’s best to tap on a day where the temperature is above freezing to avoid splitting the tree. Drill the tap hole 2 inches deep into the tree, keeping the drill level and not on an angle to assure the best sap flow. We have our drill bit marked with a piece of tape so we know exactly how deep to drill.
We drill our tap holes towards the bottom of the tree trunk, about 3 feet up from the ground. Our taps have tubes attached that go through a hole we drilled in the top of the bucket. Some people drill their holes higher on the tree and hang their buckets from the taps. These sap buckets are usually smaller and the taps for this style will have a hook on them where you can hang the bucket.
It all comes down to personal preference and how often you want to collect sap. We don’t always make it back to our maple grove out in the back woods every day to collect sap, so the 5 gallon bucket on the ground works best for us.

Once we collect the sap, we dump the 5 gallon buckets into the 30 gallon garbage can which sits on our back patio. As long as the temperatures stay in the 40’s, the sap can be stored outdoors. If it is too warm, the sap will spoil and it will be unusable.
Unfortunately we have had this happen and I cannot explain how painful it is to dump 30 gallons of sap because it has spoiled! If you have quite a bit of sap collected and the temperatures are on the rise, it is best to boil down the sap right away or throw a few bags of ice into the sap container to keep it cool until you can boil it.
We usually wait to boil down the sap until we have quite a bit collected (20-30ish gallons). While it takes much longer this way, because of the 40:1 ratio, your yield will be greater.
How you boil down your sap is a matter of personal preference as well as what type of setup and materials you have. Some people use store bought evaporators, other use an outdoor fire pit specifically built for boiling sap. They also make large electric burners that you can use as well. I DO NOT recommend boiling it down indoors! Boiling sap creates A LOT of steam, and your stove, walls and ceiling will end up very sticky!
We boil ours down on our outdoor grill. This method works best for us because our grill is hardwired into our large underground propane tank that also heats our house. If you have a grill that runs on a removable tank of propane I would not recommend using your grill. It takes between 10-12 hours to boil down 20-30 gallons of sap and you will use up your entire tank in just a few short hours.
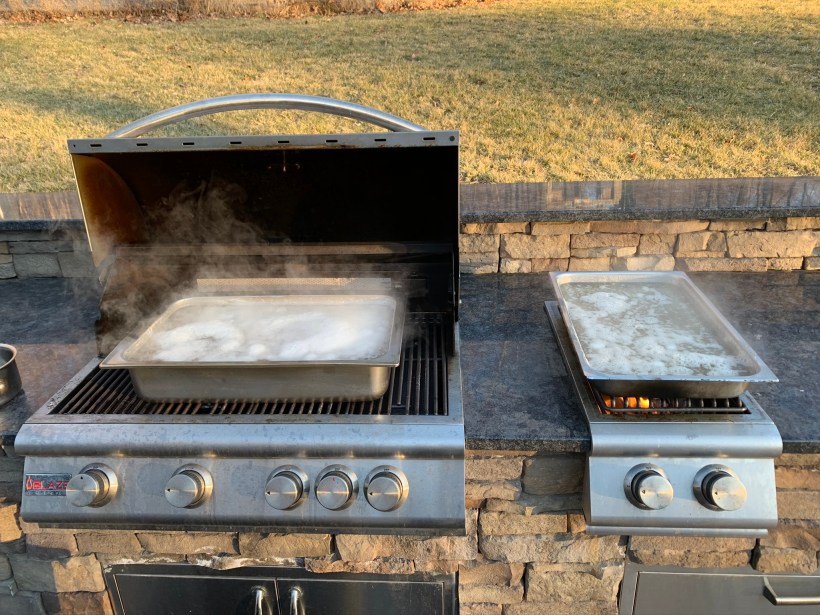
Once you have established your heat source, put 2 stainless steel buffet pans on top. When pouring the sap into the pans, use a mesh kitchen strainer to catch anything you wouldn’t want in your syrup (leaves, tree bark, etc.). As the sap boils, continually add new sap until the sap in the pan is a tan / light brown color.
The reason you should use buffet pans rather than regular kitchen pots is because of surface area. High school science my friends! High school science! The sap will boil down much faster if it is spread out over a large pan as opposed to a deep kitchen pot.
At this point it is OK to bring indoors to finish. The closer you get to finishing the boiling process, the more you will want to keep a close eye on it. You want to make sure the syrup does not boil over the correct temperature or you will end up with a maple sugar rock rather than golden brown syrup! Unfortunately I can speak from experience as this happened to us the very first time we made syrup. Oops! Live and learn right?

Using a candy thermometer, you will need to monitor the temperature of the syrup. Maple syrup boils at 7 degrees F over the boiling point of water or 219 degrees F. You will notice it is getting close when the syrup starts bubbling to the point of foaming.
After the syrup has reached 219 degrees F, you can now remove it from the heat. After you let it cool, pour it through a kitchen funnel lined with a reusable maple syrup filter and into the storage container of your choice.
We choose to can our syrup so that we can store it in our pantry and so we can use it for gifts. I think it looks very pretty in the 8oz Ball quilted canning jars 🙂 If you choose not to can your syrup, you can store it in the fridge and it will hold for about a year. Another option is to freeze your finished syrup. It will stay fresh in the freezer for about a year as well.
Fingers crossed for another great season! Happy tappin’!
